
Importing into Xpress Lister is done in 3 easy steps
1) Click Import
2) Choose file
3) Map fields
See below for detailed explanation.
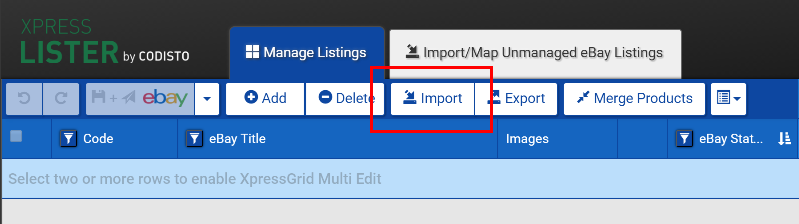
1) Click the Import button from the Xpress Grid and follow the wizard.
Download Sample (optional)
 XpressLister can import any spreadsheet XLS or CSV files as long as it contains a header row and at least one data row. If you have existing data, you can import that. If not, download the sample by clicking “XpressLister Import Sample”. It contains information about what data is supported and what is required. You can download the example template file here https://xpresslister.codisto.com/files/Codisto-XpressLister-ImportTemplate.xlsx
Using the Xpress Lister template import file
The import template file is in four color sections:

Orange – REQUIRED fields. Import into Xpress Lister will not be successful without data in these columns.
Green – OPTIONAL fields. Include data in these columns if you wish to supplement your listings. (Images are optional during the import process because they can be added one by one in Xpress Lister but it is generally much faster to import them via URL – see importing Images).
Yellow – OPTIONAL Item Specific fields. You can add more columns for additional/different item specifics. During import you define which columns are Item Specifics and ‘map’ the columns.
Blue – REQUIRED FOR MULTI-VARIANT LISTINGS ONLY (ignored if no multi-variant listings are detected). Multi-variant listings are detected by the presence of Parent/child ‘product and related sku’ codes – see example product import sheet. You can add more columns for additional/different variant titles. During import you define which columns are Variants and ‘map’ the columns.
2) Choose a file

You can either Drag & Drop your data file into the box with the dashed border, or click the Choose File button to browse your computer for the file.
3) Map fields
The screen shots shown in this section are based on the sample file. If you are using your own file, the field names in the Import Field column will be different, but the concepts are the same.
XpressLister automatically maps fields based on commonly used field names.
 When a field is mapped, the background is green. Unmapped fields have a white background. In the image above, Product Code is mapped to the Code column of the spreadsheet, Name to Title and Description to Description. These mapping happen automatically.
The Quantity Field is not mapped. The Import Field column shows “Please Select…”. Clicking the drop down list shows all available columns in the import file.
 Choosing StockLevel maps the field.
Overwrite Existing Products
If the “Overwrite Existing Products” checkbox is ticked, products in the import file with matching product code will be updated with the data in the import file. This feature is particularly useful for updating prices and stock levels based on an external system.

Completing the import

Click the Import button to complete the import. A summary of the import is displayed. It will list any issues including which products where not imported with a reason.
Import Summary

Review the “Issues during import” section to see if any changes need to be made to the import file before importing again.
Click Close to finish and refresh Xpress Grid with the updated data.